6 Reasons To Tile Your Countertop

Image

Most people think of tile as only being used on the wall or floor.  However there is one place where tiles work extremely well and that is the countertop.  Here are 6 great reasons to tile your countertop:

Easy to clean: Porcelain and ceramic tiles are very easy to keep clean.  This as anyone who cooks knows is especially important for the countertop because this is where food is prepared.  Any household cleaner is perfect for cleaning both a ceramic or porcelain countertop.  

 Heat resistant:  Unlike other materials ceramic and porcelain tile is heat resistant.  This makes tile perfect for the area near the stove where other materials would easily be damaged by extreme heat.

 Stain resistant:  Because the counter top is used for preparing food, it is inevitable that there will be oil and other liquids being used which would easily stain many types of materials.   Unlike some types of porous stone tiles ceramic and porcelain tiles are stain resistant making them ideal.

 You can do it yourself:  Tiling a countertop is not as hard as many people think. In fact it is easy enough for a beginner DIY project.  And because you can do it yourself that means you are saving money on installation as well.

Easy to repair:  Not only is a porcelain or ceramic countertop easy to install, but it is also easy to repair.  Replacing broken single tiles or grout is also a quick and easy job any beginner can handle.

So many options:  There are so many options available that there is literally something for everyone.   Both ceramic and porcelain come in almost unlimited colors and designs. Some porcelain designs mimic wood and stone so well that they are virtually undistinguishable from the real thing.

As you can see, there are so many amazing reasons to tile your countertop that it’s a wonder everyone doesn’t do it!  The only hard part about doing so is choosing which style and color to use because there are so many available.  Here are a few extra tips to help you on your way: 

Some Extra Tips:      

 –  Always used glazed tiles as opposed to unglazed.   Glazed tile is stain resistant while unglazed is not.

– Use floor tile rather than wall tile.  Wall tile is too fragile to be used on countertops.  Floor tile is thicker and more durable, making it ideal for the abuse that countertop tiles can receive. 

– To help protect your grout from staining make sure you use one with a liquid latex additive.  Also make sure you seal the grout with a quality sealant and then reapply it once a year for further protection.

For a good article on many countertop options click here: http://en.wikipedia.org/wiki/Countertop

Outdoor Tiles: 3 Great Things They Can Add To Your Home

Image

For many homeowners tiles are something which they only use inside of their home.   However outdoor tiles are an amazing tool that can be used to add 3 very important things to their home.

Beauty: Outdoor tiles are beautiful.   While a concrete patio does have its function it can’t compare with the look and feel of outdoor tiles. A perfect example is stone tiles.  Nothing beats the beauty of the natural look and texture that outdoor tiles can provide.  With such a large variety of stone tiles in almost every shade and color they can transform your yard into a place of beauty and nature.    What else is your yard for if not to provide you and your family with a place to have fun and relax in your spare time? 

A Functional Space:  Outdoor tiles can not only add beauty, but they can provide a functional place for you and your family to use.  Whether that means providing a place to entertain friends, play, or just sit and relax there are outdoor tiles to fit every function.   Many types of outdoor tile are designed with safety and grip in mind.   Rubber patio tiles for example not only can give you the grip you need especially in wet areas like around a pool or water feature but  can also provide a soft landing in case of an accident.   Because many stone tiles are naturally textured, they also make great slip resistant tiles and provide beauty at the same time.  Outdoor tiles are manufactured with strength and durability as a main priority and with so many different materials to choose from such as rubber, porcelain, and stone and each providing its own specific advantages the possibilities are endless.   

Value: Both beauty and function are great reasons to use outdoor tiles. However, another great reason to use them is value.  A space which is both functional and beautiful is also valuable.  Installing outdoor tiles is an easy way to increase the value of your home.   This value is not only in the value of the enjoyment from the use of the functional space they create but also the value they can create in terms of how much your house is worth.   While some outdoor tiles can be expensive no matter what price you pay, they will always make your house worth way more than you paid for them.  

As you can see outdoor tiles are a great investment.  Not only can they make your space more beautiful and functional but much more valuable as well.  Install outdoor tiles and you will enjoy these benefits for years to come.    

If you would like to find out more information and tips about outdoor tiles click here:   http://www.tilehomeguide.com/outdoor-tiles-explained-a-quick-and-easy-beginners-guide/


The 3 Most Common Reasons You Will Need To Fix Your Tile

Image

While tile is an extremely durable wall and floor covering, there are times when they must be repaired or replaced.   There are many ways that tile can become damaged however it usually comes down to 3 reasons. It’s very important for the homeowner to know what these reasons are so they can take care of them before they become a major issue.

The most common problem by far is damaged grout.  Not only can damaged grout be extremely unattractive but it is dangerous for your tile.  Damaged grout puts tile at risk for water damage.   Why is water damage so dangerous?  It’s because if water works its way under the tiles it can destroy the base of the tiles.  And this can cause the whole installation to become compromised.   A lot of wasted money for a seemingly small problem.  Always make sure you remove and regrout grout that has been damaged.  Don’t leave this job or problem for a later time; deal with it when you first see it or you will ending dealing with a much bigger and more expensive problem.

Another thing you must be careful of is damaged caulk.  This problem is most often seen on backsplashes, in the shower or tub, and around sinks.   This is because the joints of these spots are covered with caulk to protect them from water.   And just like with damaged grout, deteriorating or damaged caulk provides water with an opportunity to get in and damage the base of the tile which can cause the homeowner a lot of money if they are not quick to react.  Cut out damaged caulk and replace it with new caulking upon seeing the first signs of a problem

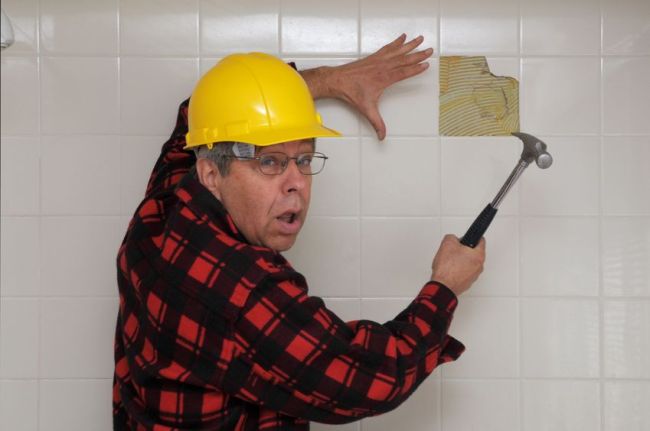
  Broken tiles are another reason you need to repair your tile. While not as common as the first two reasons for repair, but accidents do happen.   Many broken tiles are the result of someone accidentally dropping something heavy on the floor, however a more common cause, especially with wall tiles is accessories that were not installed correctly coming loose and either damaging or breaking the tiles near it.  This could be anything from a soap dish to a towel rod.  Broken tiles need to be replaced immediately and regrouted because just as with damaged grout and caulk, this leaves an easy point of entry for water.  It would also be wise to make sure all accessories are anchored to wall studs or if they are screwed in, make sure to drill pilot holes and use plastic sleeves for the screws for a much sturdier install. 

As with most things in life, “an ounce of prevention is worth a pound of cure.”  And dealing with tiles is no exception.   All 3 of these common problems are easy and inexpensive fixes if dealt with in a timely manner.   However if left too long can turn into a much more expensive problem.  Always make sure your grout and caulk are in good shape and accessories are installed correctly the first time around, and you will save yourself a huge headache and a pile of cash. 


A Quick Intro to the Most Common Tiling Tools

Image

Like any job or project cutting, setting, or repairing tiles requires the correct tools.  The following are the most essential tools used by tile professionals, DIY homeowner’s, and anyone working with tile.

Tile Cutter:  Also called a snap cutter, this is an inexpensive way to cut tile. It’s a useful tool if you need to cut a few tiles for smaller jobs in which the tiles aren’t too big, heavy, or made from stone.

Tile Stone:  It’s always a smart idea to use one of these to smooth over sharp edges of tiles cut from a snap cutter.  It can also be used to take off small pieces or edges so that tiles can fit.

Wet Tile Saw: This is the best way to cut tile, but also the most expensive.  Wet tile saws use a diamond blade cooled by water to effortlessly slice through large quantities of any material tile.

Tile Grinder:  A very useful tool for making odd cuts as well as being great for removing old tile. This tool is less accurate than a wet saw because it is hand held.

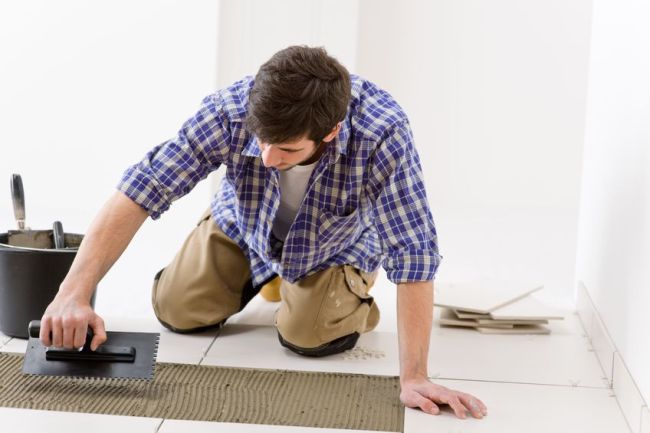
Trowel: The trowel is used to spread and apply mortar on the surface which the tile will be laid.  It also is used to apply mortar to the back of the tiles.

Tile Spacers:  These are an extremely important tool.   Tile spacers are used to space tiles evenly.  They are used in the corners of the tile. 

Rubber Mallet: This is the perfect tool to softly set tiles into the mortar without damaging them.

Needle nose Pliers: While not essential, these are a great tool to have on hand when removing tile spacers.

Grout Float: While it looks almost like a trowel, this tool is used for apply grout into the joints.  It is also used to get rid of extra grout on the surface of the tiles and can be used to push tile into the mortar as well.

Grout Sponge:  This sponge is used to help wipe off extra grout from the tile.

Buff Rags: These are handy for buffing out grout haze.

Caulk Gun:   The perfect tool for filling in expansion joints and where the tile meets other material.

With the exception of the wet tile saw (which not every project will need) these tools are pretty much all essential as well as inexpensive.  Before starting any tiling job it would be wise to have all of these tools on hand before you start your project to ensure properly cut, laid, or repaired tiles which will be enjoyed for years to come.

 For a good article to get you started tiling click here:http://www.nytimes.com/2011/05/12/garden/learning-to-tile-and-taking-it-slow-the-pragmatist.html?pagewanted=all

Tile Patterns: 3 Secret Methods For Using Them To Your Advantage

Tile Patterns

The long lines of these brick pavers use the running bond draw our eyes to this beautiful sunset view

While most people think of tile patterns as the way in which tiles are positioned, and while this is true, they are really much more than that.  Tile patterns are tools which homeowners can use to get the most out of their space.  If used correctly these tools can be used to make a space look wider, longer, and draw the eye to places of beauty.  Here are 3 ways to do so:

Tile professionals often use one secret to make a narrow space look larger or wider.  While this method is often used outdoors with pavers or stone slabs, any type of rectangular tiles will work, and can also be applied indoors as well.   To create a space which looks wider than it is tiles should be laid down in the running bond pattern or the straight lay.  These two patterns have long straight lines which our eyes tend to follow.  The trick is to position the rectangular tiles and the pattern across the width of the space.   Because our eyes are following the long lines created by the pattern across the width of the space it creates the effect of making the space appear to be much wider than it really is.   

Using this same concept with the straight lay or running bond pattern and rectangular tiles can also make an area look much longer than it really is.   To accomplish this instead of positioning the tiles across the width of the space, you position them lengthwise so that the long length of the rectangular tiles is facing you. These patterns again form long lines for the eye to follow; stretching out in front of us tricking the brain into thinking the space is actually much longer than it is.

 Another secret that many professionals use outdoors as well as indoors to add to the effect of a tile pattern is the use of focal points.  Focal points can be anything interesting, or beautiful, such as: a water feature, ornamental tree, or background view.  However, the key to using a focal point correctly is again using it in conjunction with the straight lay or running bond tile pattern. Because our eyes will naturally follow the lines of the pattern, we can use the pattern and the focal point together.  We can position the tile pattern so the lines of the tile line up with the focal point, drawing the eye along the lines to focus on what we want it to.  Or we can build or place a focal point in a position that lines up with the lines of the tile pattern.  This can be even more effective if we line both the focal point and the tile pattern up with our view points.  Lining them up with the view from a window, doorway or from our line of sight as we enter the space would accomplish this perfectly and are all excellent options. 

These 3 secrets are simple enough for any homeowner to apply themselves and transform their space into one which looks amazing.  Whether you need to make your space look wider, longer, or just want get the most from the space and pattern all are an easy fix with these 3 secrets.

To find out some more secrets and tips of the pro’s click here: http://www.tilehomeguide.com/tile-patterns-the-ultimate-quick-read-beginners-guide-including-secrets-of-tile-professionals-revealed/